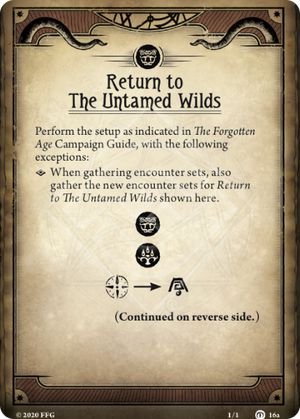
Scenariusz
Perform the setup as indicated in The Forgotten Age Campaign Guide, with the following exceptions:
- When gathering encounter sets, also gather the new encounter sets for Return to The Untamed Wilds shown here.
(Continued on reverse side.)
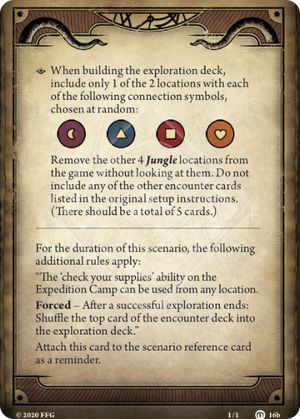
Return to The Untamed Wilds - Back
- When building the exploration deck, include only 1 of the 2 locations with each of the following connection symbols, chosen at random: Purple Moon, Blue Triangle, Red Square, Orange Heart. Remove the other 4 Jungle locations from the game wihtout looking at them. Do not include any of the other encounter cards listed in the original setup instructions. (There should be a total of 5 cards.)
For the duration of this scenario, the following additional rules apply:
"The 'check your supplies' ability on the Expedition Camp can be used from any location.
Forced - After a successful exploration ends: Shuffle the top card of the encounter deck into the exploration deck."
Attach this card to the scenario reference card as a reminder.
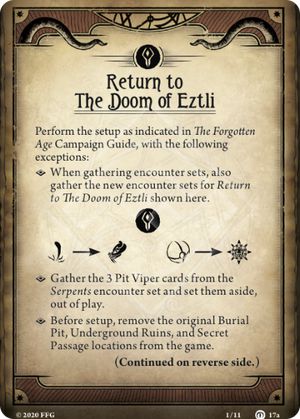
Scenariusz
Perform the setup as indicated in The Forgotten Age Campaign Guide, with the following exceptions:
- When gathering encounter sets, also gather the new encounter sets for Return to The Doom of Eztli shown here.
- Gather the 3 Pit Viper cards from the Serpents encounter set and set them aside, out of play.
- Before setup, remove the original Burial Pit, Underground Ruins, and Secret Passage locations from the game.
(Continued on reverse side.)
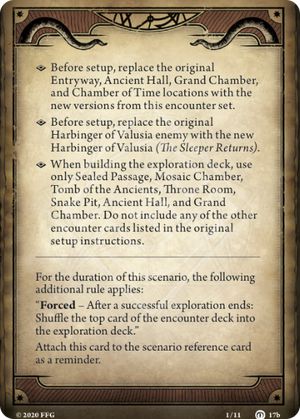
Return to The Doom of Eztli - Back
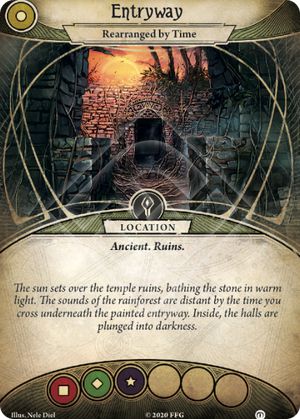
- Before setup, replace the original Entryway, Ancient Hall, Grand Chamber, and Chamber of Time locations with the new versions from this encounter set.
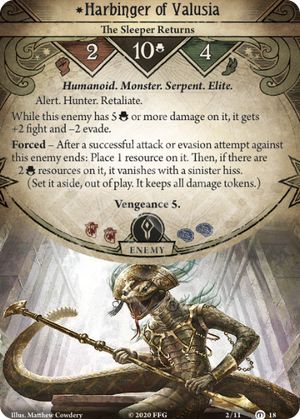
- Before setup, replace the original Harbinger of Valusia enemy with the new Harbinger of Valusia (The Sleeper Returns)
- When building the exploration deck, use only Sealed Passage, Mosaic Chamber, Tomb of the Ancients, Throne Room, Snake Pit, Ancient Hall, and Grand Chamber. Do not include any of the other encounter cards listed in the original setup instructions.
For the duration of this scenario, the following additional rule apply: "Forced - After a successful exploration ends: Shuffle the top card of the encounter deck into the exploration deck."
Attach this card to the scenario reference card as a reminder.
Harbinger of Valusia
The Sleeper Returns
Wróg
Humanoid. Monster. Serpent. Elite.
Alert. Hunter. Retaliate.
While this enemy has 5 or more damage on it, it gets +2 fight and -2 evade.
Forced - After a successful attack or evasion attempt against this enemy ends: Place 1 resource on it. Then, if there are 2 resources on it, it vanishes with a sinister hiss. (Set it aside, out of play. It keeps all damage tokens.)
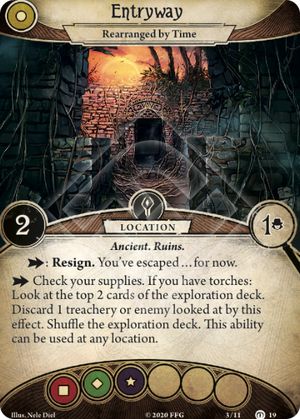
Entryway - Back
Entryway
Rearranged by Time
Lokalizacja
Ancient. Ruins.
: Resign. You've escaped... for now.
: Check your supplies. If you have torches: Look at the top 2 cards of the exploration deck. Discard 1 treachery or enemy looked at by this effect. Shuffle the exploration deck. This ability can be used at any location.
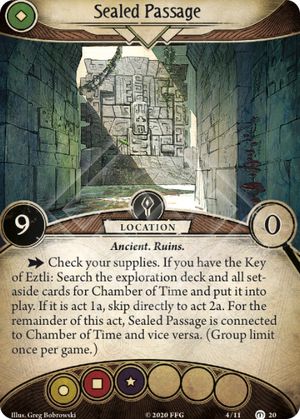
Lokalizacja
Ancient. Ruins.
Check your supplies. If you have the Key of Eztli: Search the exploration deck and all set-aside cards for Chamber of Time and put it into play. If it is act 1a, skip directly to act 2a. For the remainder of this act, Sealed Passage is connected to Chamber of Time and vice versa. (Group limit once per game.)
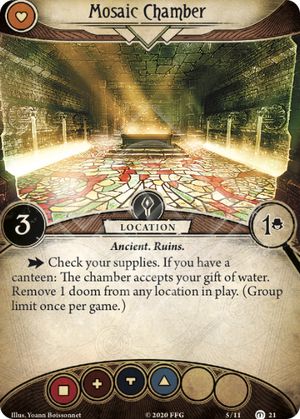
Lokalizacja
Ancient. Ruins.
Check your supplies. If you have a canteen: The chamber accepts your gift of water. Remove 1 doom from any location in play. (Group limit once per game.)
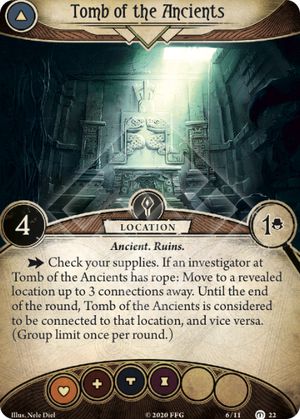
Lokalizacja
Ancient. Ruins.
Check your supplies. If an investigator at Tomb of the Ancients has rope: Move to a revealed location up to 3 connections away. Until the end of the round, Tomb of the Ancients is considered to be connected to that location, and vice versa. (Group limit once per round.)
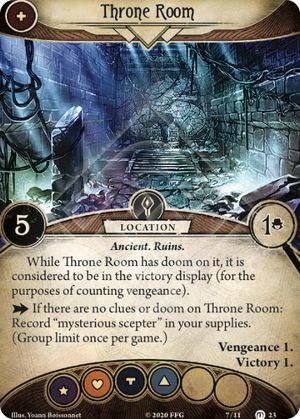
Lokalizacja
Ancient. Ruins.
While Throne Room has doom on it, it is considered to be in the victory display (for the purposes of counting vengeance).
If there are no clues or doom on Throne Room: Record "mysterious scepter" in your supplies. (Group limit once per game.)
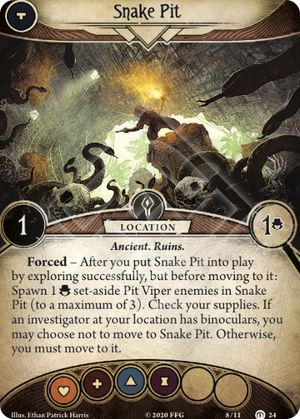
Lokalizacja
Ancient. Ruins.
Forced - After you put Snake Pit into play by exploring successfully, but before moving to it: Spawn 1 set-aside Pit Viper enemies in Snake Pit (to a maximum of 3). Check your supplies. If an investigator at your location has binoculars, you may choose not to move to Snake Pit. Otherwise, you must move to it.
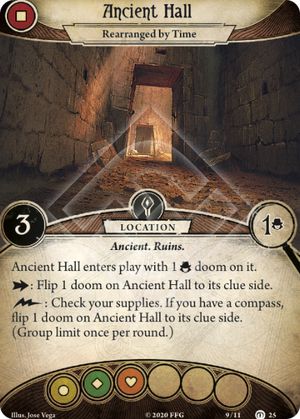
Ancient Hall
Rearranged by Time
Lokalizacja
Ancient. Ruins.
Ancient Hall enters play with 1 doom on it.
: Flip 1 doom on Ancient Hall to its clue side.
: Check your supplies. If you have a compass, flip 1 doom on Ancient Hall to its clue side. (Group limit once per round.)
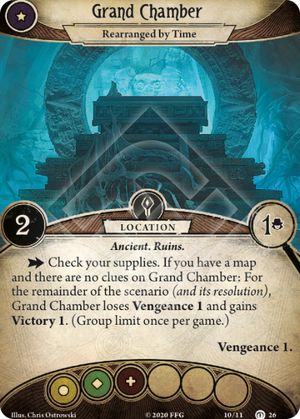
Grand Chamber
Rearranged by Time
Lokalizacja
Ancient. Ruins.
Check your supplies. If you have a map and there are no clues on Grand Chamber: For the remainder of the scenario (and its resolution), Grand Chamber loses Vengeance 1 and gains Victory 1. (Group limit once per game.)
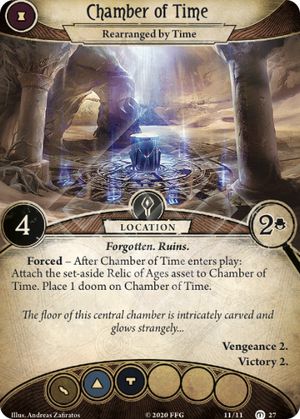
Chamber of Time
Rearranged by Time
Lokalizacja
Forgotten. Ruins.
Forced - After Chamber of Time enters play: Attach the set-aside Relic of Ages asset to the Chamber of Time. Place 1 doom on Chamber of Time.
Scenariusz
Perform the setup as indicated in The Forgotten Age Campaign Guide, with the following exceptions:
- When gathering encounter sets, also gather the new encounter sets for Return to Threads of Fate shown here.
- Set the Veda Whitsley story asset aside, out of play.
(Continued on reverse side.)
Return to Threads of Fate - Back
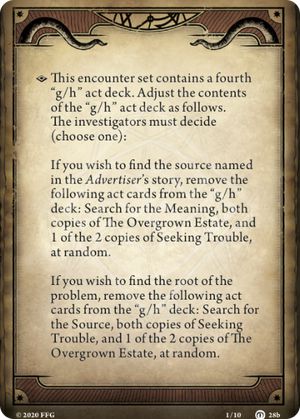
- This encounter set contains a fourth "g/h" act deck. Adjust the contents of the "g/h" act deck as follows. The investigators must decide (choose one):
If you wish to find the source named in the Advertiser's story, remove the following act cards from the "g/h" deck: Search for the Meaning, both copies of The Overgrown Estate, and 1 of the 2 copies of Seeking Trouble, at random.
If you wish to find the root of the problem, remove the following act cards from the "g/h" deck: Search for the Source, both copies of Seeking Trouble, and 1 of the 2 copies of The Overgrown Estate, at random.

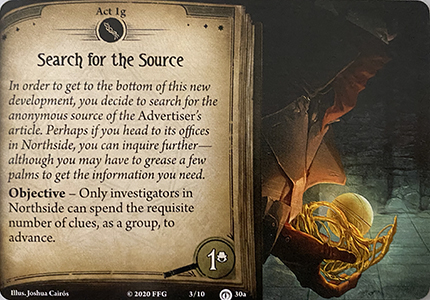
Akt. Stage 1
Objective - Only investigators in Rivertown can spend the requisite number of clues, as a group, to advance.
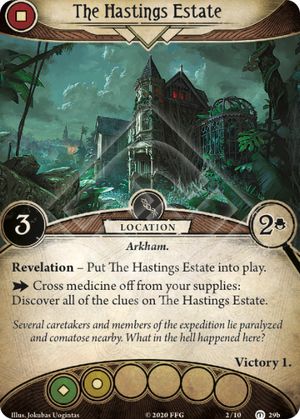
Lokalizacja
Arkham.
Revelation - Put The Hastings Estate into play.
Cross medicine off from your supplies: Discover all of the clues on The Hastings Estate.

Akt. Stage 1
Objective - Only investigators in Northside can spend the requisite number of clues, as a group, to advance.
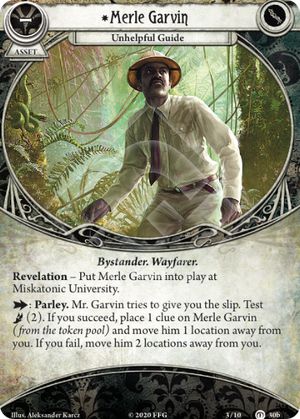
Merle Garvin
Unhelpful Guide
Atut
Bystander. Wayfarer.
Cost: –.
Revelation - Put Merle Garvin into play at Miskatonic University.
: Parley. Mr. Garvin tries to give you the slip. Test (2). If you succeed, place 1 clue on Merle Garvin (from the token pool) and move him 1 location away from you. If you fail, move him 2 locations away from you.
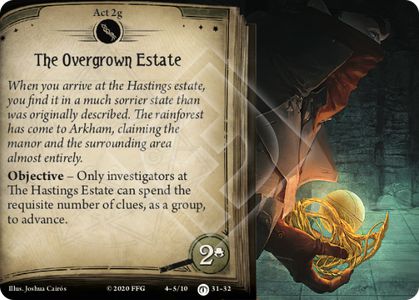
Akt. Stage 2
Objective - Only investigators at The Hastings Estate can spend the requisite number of clues, as a group, to advance.
Sent from Another Time - Back
Search the collection for the Harbinger of Valusia (The Sleeper Returns) and spawn it at The Hastings Estate. It enters play with damage on it equal to the amount of damage recorded in parentheses in your Campaign Log. If there are 5 or fewer tally marks under "Yig's Fury" in your Campaign Log, it enters play exhausted.
Advance to Act 3g - "Impossible Pursuit".
Akt. Stage 2
Objective - Only investigators at The Hastings Estate can spend the requisite number of clues, as a group, to advance.
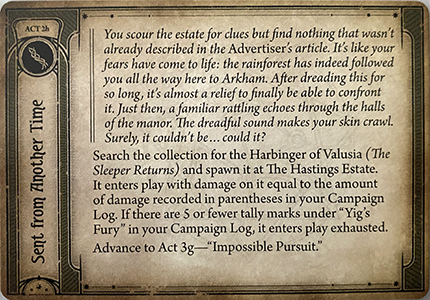
Clinton Freeman
Should Have Stayed Home
Atut
Bystander. Wayfarer.
Cost: –.
Revelation - Put Clinton Freeman into play at Velma's Diner. Advance to Act 3g - "Discover the Truth."
: Parley. Test or (3). If you succeed, place 1 clue on Clinton Freeman (from the token pool) and take 1 horror. If you fail, take 1 horror for each point you failed by.

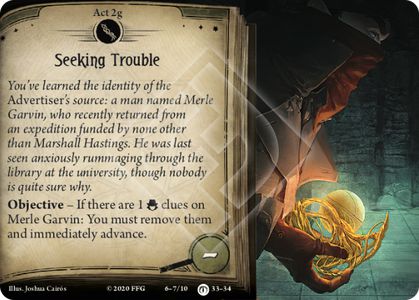
Akt. Stage 2
Objective - If there are 1 clues on Merle Garvin: You must remove them and immediately advance.
Sent from Another Time - Back
Search the collection for the Harbinger of Valusia (The Sleeper Returns) and spawn it at Merle Garvin's location. It enters play with damage on it equal to the amount of damage recorded in parentheses in your Campaign Log. If there are 5 or fewer tally marks under "Yig's Fury" in your Campaign Log, it enters play exhausted.
Advance to Act 3g - "Impossible Pursuit".

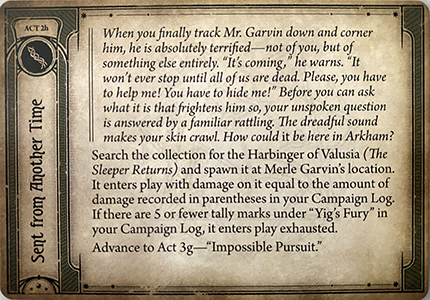
Akt. Stage 2
Objective - If there are 1 clues on Merle Garvin: You must remove them and immediately advance.
Lokalizacja
Arkham.
Revelation - Put Loading Docks into play with 4 resources on it. Advance to Act 3g - "Discover the Truth."
While there are no resources on Loading Docks, clues on it cannot be discovered by any means.
Forced - At the end of the round: Remove 1 resource from Loading Docks.
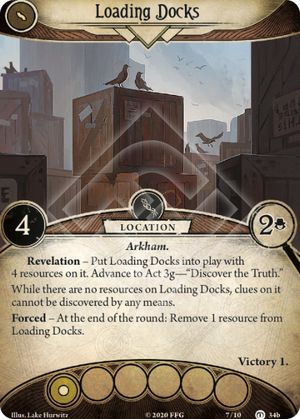
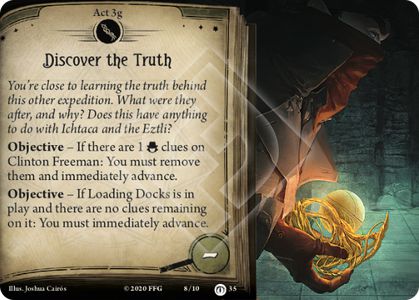
Akt. Stage 3
Objective - If there are 1 clues on Clinton Freeman: You must remove them and immediately advance.
Objective - If Loading Docks is in play and there are no clues remaining on it: You must immediately advance.
Another Expedition - Back
If Clinton Freeman is in play:
Mr. Freeman finally reveals to you the truth: that his expedition was partially funded by a mysterious "philanthropist" in Mexico City, in return for several relics. Curious - and worried - he and his partners offer to help you get to the bottom of this.
The investigator nearest to Clinton Freeman takes control of the set-aside Veda Whitsley. Remove the remainder of the "g/h" act deck from the game. If another act card is in play, continue playing. Otherwise, proceed to (→R1).
If Loading Docks is in play:
Thanks to Mr. Garvin's information, you discover that many of the expedition's finds are heading to a surprising destination: an unspecified recipient in Mexico City. Grateful for your assistance, several members of the expedition offer you their help.
The investigator nearest to the Loading Docks takes control of the set-aside Veda Whitsley. Remove the remainder of the "g/h" act deck from the game. If another act card is in play, continue playing. Otherwise, proceed to (→R1).